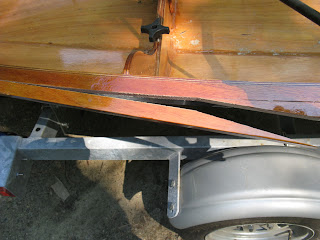
I finished assembling the sliding seat. I got some Never Seez a few days ago to put on the big nuts that hold the pins that support the oar locks. I was surprised that there were so many pieces for the oar locks but finally got everything together. When I brought it out to put it on the dory, I was shocked to discover that one of the scarf joints on the port side rail had separated and that over a foot of the rail was sticking out. The maiden voyage of the dory was more difficult than I realized. At least it waited until we got home before coming apart. I called CLC to see if maybe I should screw it together, but was told to just sand out the joint, tape any parts that I didn't want to get epoxy on, make sure that thickened epoxy covered both surfaces of the joint and clamp it together as I had before. Epoxy is stronger than screws.
 |
| A day after the maiden voyage, I discovered that the rail split along the seam. |
Once that repair was made, I attached the slide seat to the supports that I had built. I drilled a hole through the rail and bolted it to the T-shaped support that gets bolted through the bulkhead. For bow end I realized that I didn't need to drill through the rail and could use the existing threaded sockets in the bottom of the rail. I drilled a hole through the okoume plywood that I glued to my cedar support board. Unfortunately, I drilled in in the wrong spot and had to drill another hole, but finally I got it attached. I put some furniture pads on the bottom of the cedar board and then put the whole assembly in place. The final step was to attach the wood supports to the boat with four bolts and wing nuts. To take it in and out of the boat, I just need these four bolts.
 |
| The dory is ready for its sliding seat launch. |
No comments:
Post a Comment